

How to assign a fob to a key set
In short: Tap the fob on the Hive, or scan it with the mobile app, then find the key set it belongs to and confirm. From then on, scanning that fob pulls up that key set.
When you’d do this: When a key set has no fob on it, whether it’s a new set you’ve just added, a set whose fob was removed, or one coming back from a long-term checkout. A key set can’t be checked out until it has a fob, so this is what makes it ready to go.
Before you start
Fobs are assigned on the Hive or the mobile app, not in the portal.
Attach the fob to the keys first. Put the fob on the ring before you scan it, so the pairing on screen matches the pairing in your hand.
The key set needs to exist. If it doesn’t yet, you can create it without leaving this flow. See How to create a key set.
On the Hive
-
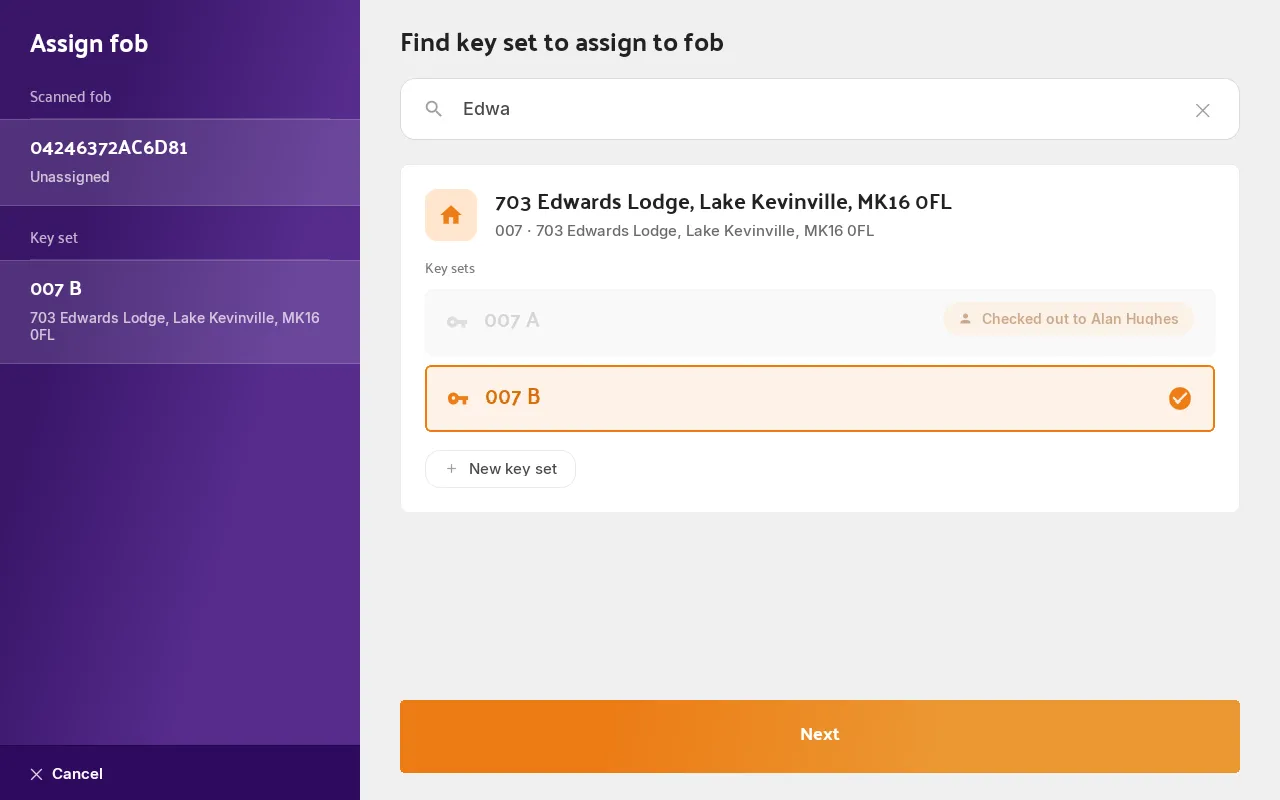
Tap the fob on the reader, the stickered spot on the unit. Because the fob isn’t on a key set yet, the Hive opens the Assign fob flow rather than a checkout (“Unassigned fob scanned!”). The panel on the left shows the fob you’re working with.
-
Search for the asset the keys belong to, by name or by key / hook number. Each result lists that asset’s key sets underneath it.
-
Tap the key set this fob belongs to, then tap Next. Sets that already have a fob are greyed out and marked “Already assigned to fob”. See Good to know below.
-
Check the summary and tap Assign fob. The screen shows the key set you’re about to link, and reminds you to physically attach the fob if you haven’t. You can add a photo of the keys here too.
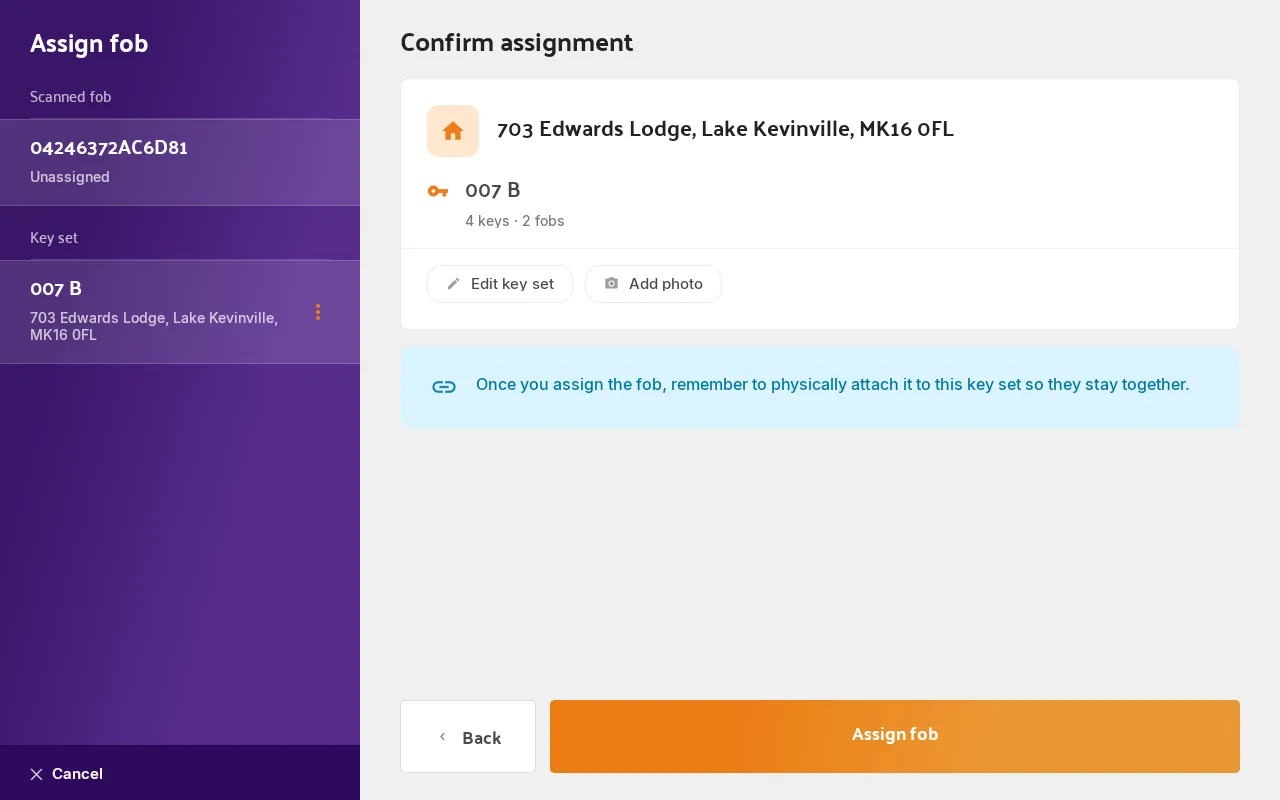
The key set is now available and can be checked out by scanning that fob.
On the mobile app
-
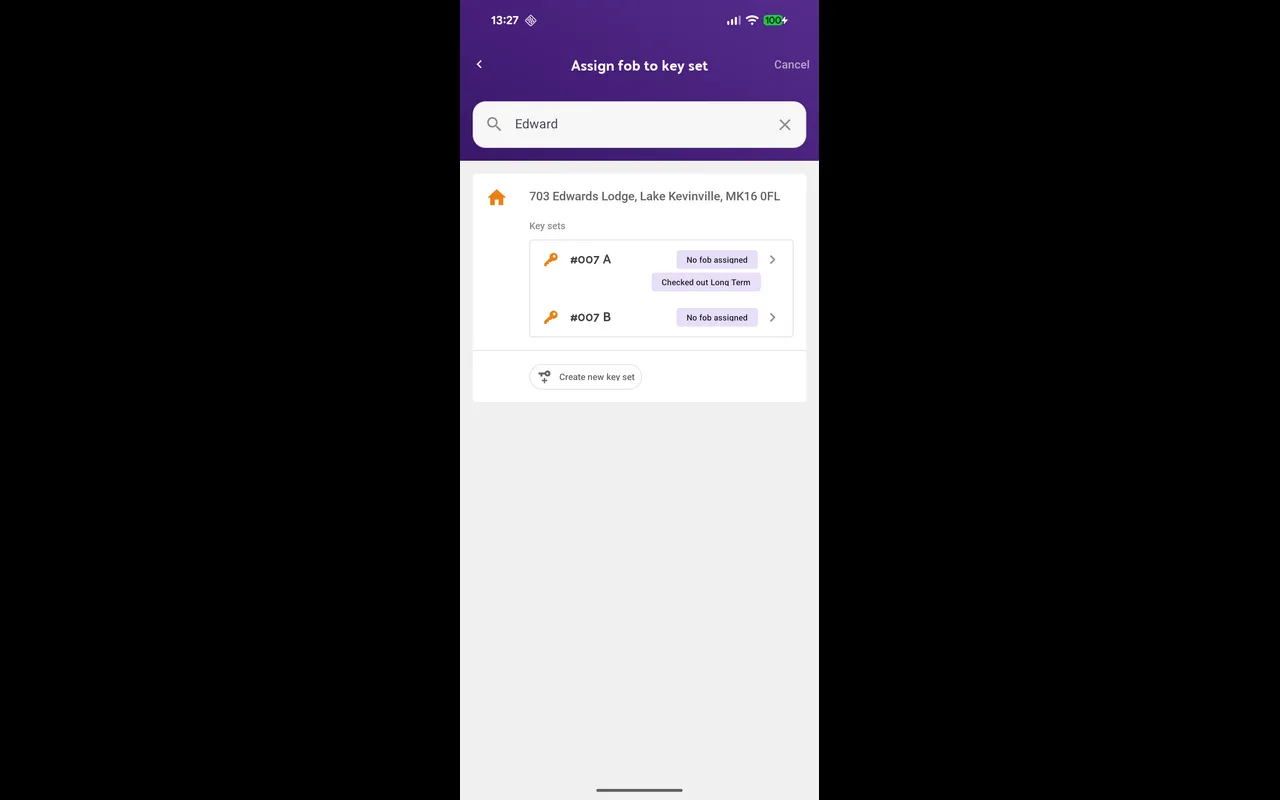
Scan the fob from the home screen. The app opens the Assign fob to key set step.
-
Search for the asset and tap the key set the fob belongs to.
-
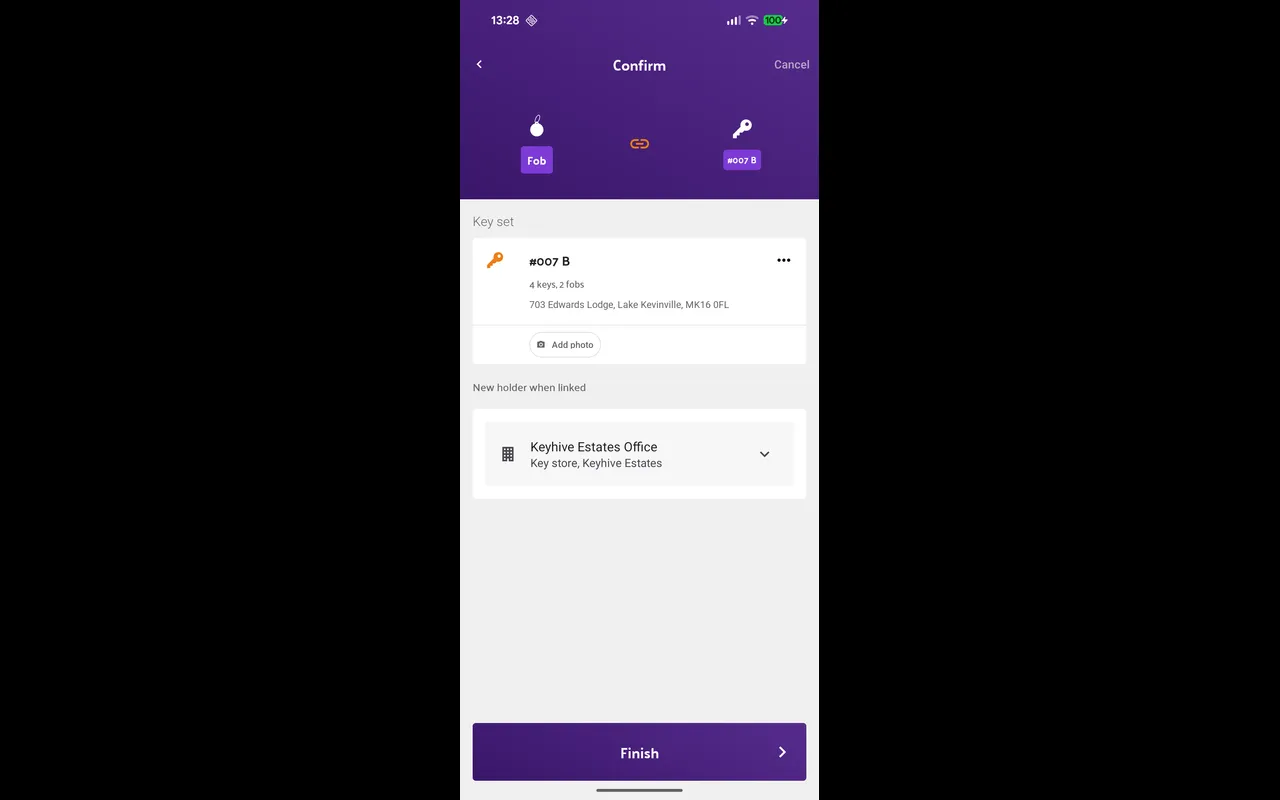
Check the confirmation screen and tap Finish. It shows the fob and the key set side by side. If your account has more than one key store, you can also set where the keys will be held from now on.
Good to know
- If the key set was checked out, assigning a fob also brings it back. The checkout is completed at the same time and the keys are recorded as returned; the Hive tells you this on the confirmation screen. This is how a long-term key set comes back, since its fob was removed when it went out. See How to return a key.
- A key set has one fob at a time. A set that already has one is greyed out in the list, so you can’t quietly end up with two fobs for the same keys. To put a different fob on it, take the old one off first. See How to unassign a fob.
- One fob at a time. Unlike checking out or returning, where you can keep scanning, assigning handles a single fob per go. The Hive will tell you to finish or cancel before you scan another.
- No key set to assign to? You can create one from the same screen: tap New key set on the asset (Create new key set on the phone). See How to create a key set.
- The asset has to be there already. Assets are only created in the portal, so if the search finds nothing, add the asset first. See How to create an asset.