

Giving a staff member access to more than one branch
In short: Switch to the branch you want to give them access to, click Staff in the sidebar, then Invite, and enter the email address they already use for Keyhive. Keyhive recognises them and offers Add to this branch: one click, no second account, no second invite.
When you’d do this: When someone works across more than one of your branches, covering another team, moving between sites, or running several branches. They keep one login and switch between branches inside Keyhive.
Before you start
This is an admin job. You need Manager or Admin access, at the branch you’re adding them to.
It’s a portal job. You can’t change anyone’s branch access from the Hive or the mobile app.
They need to be in Keyhive already. If they’re new to the business, invite them first. See How to invite a staff member, and pick their branches while you’re there.
You don’t need to do this for Admins. That role already reaches every branch in your business, whether or not anyone has added them to one.
Add them to another branch
-
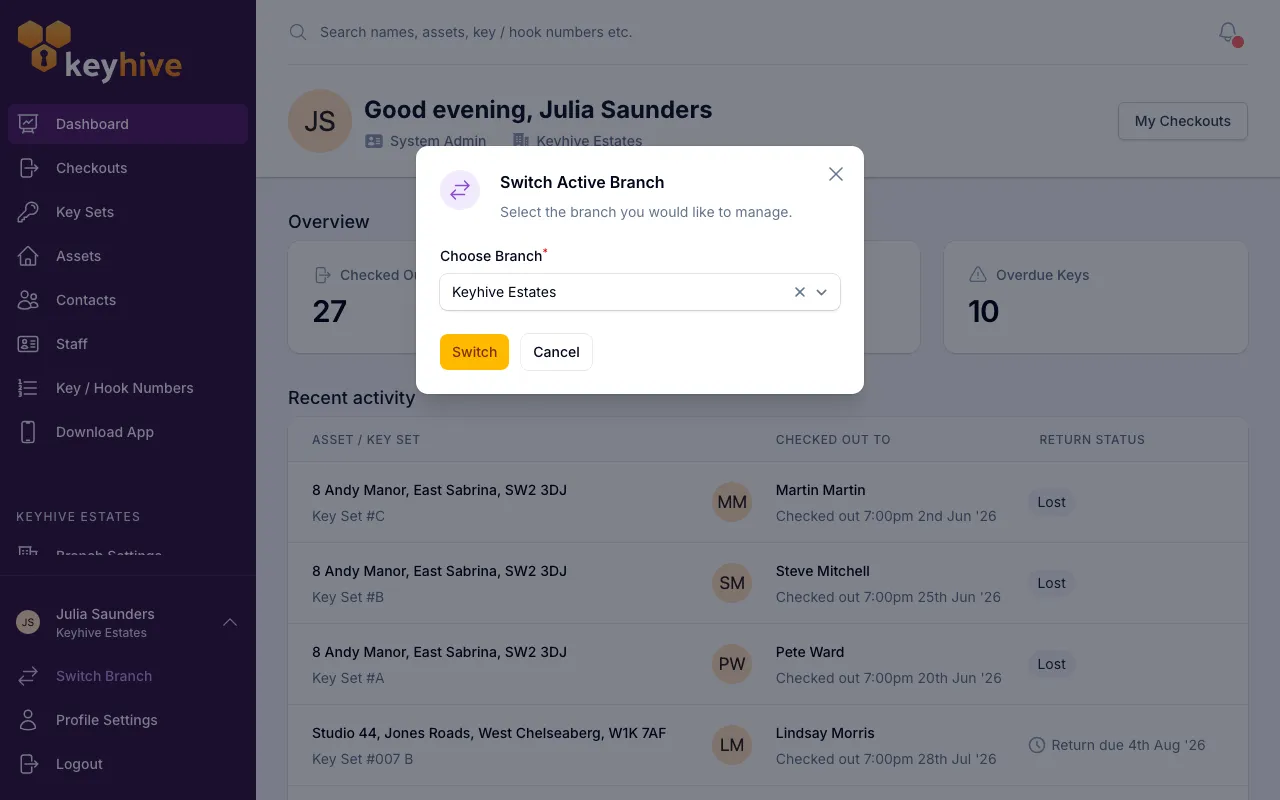
Switch to the branch you’re giving them access to. Click your name at the bottom of the sidebar, then Switch Branch. This step matters: the button in step 4 adds them to whichever branch you’re in right now.
-
Click Staff in the sidebar, then Invite at the top of the list.
-
Type the email address they already use for Keyhive and click Continue.
-
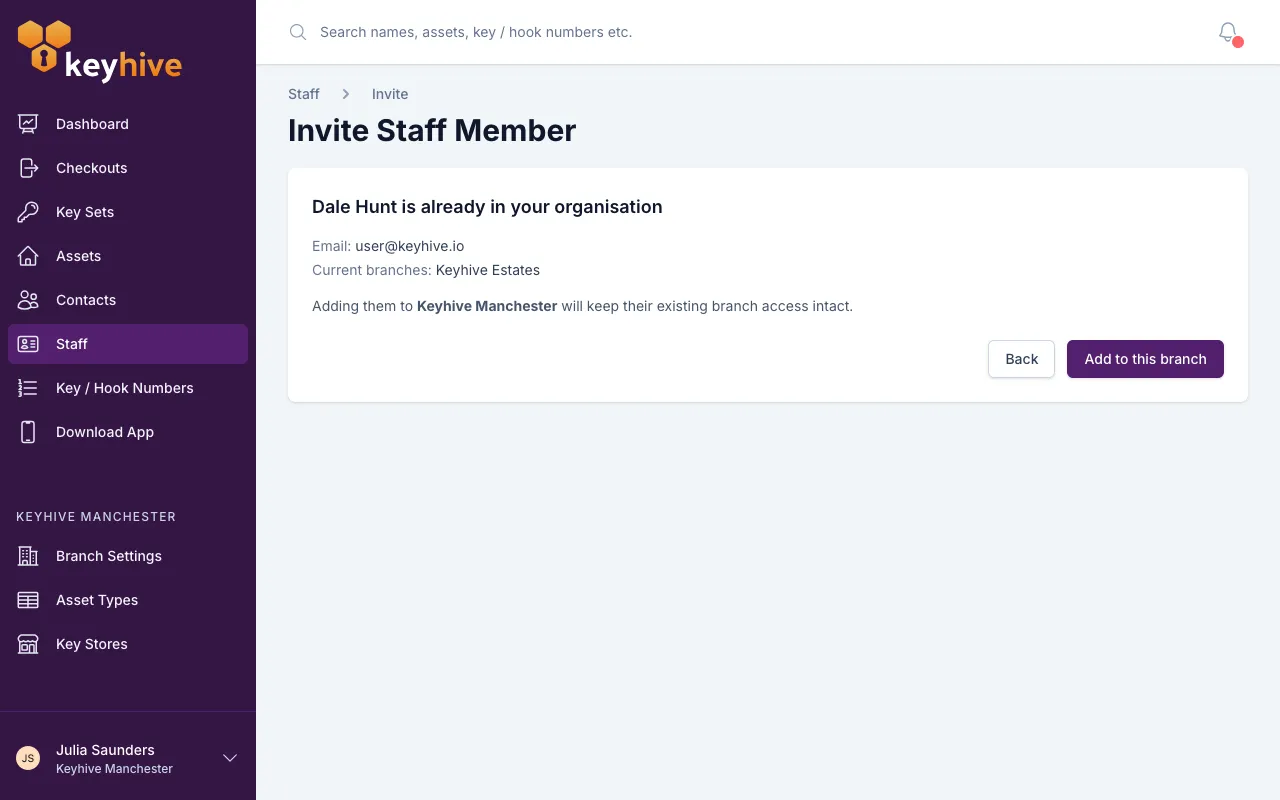
Keyhive recognises them. You get a screen headed “[name] is already in your organisation”, showing their email and the branches they’re in today. Click Add to this branch.
You land on their page, and their new branch is listed under Assigned branches. Nothing they already had is affected.
Get “This user is disabled” instead? Their access was turned off at some point. Restore them from the Staff list first, then come back and add them.
Or set their branches directly
Admins only. Open the person from the Staff list, choose Edit from the ⋮ menu next to their name, and you’ll see a Branch Access section listing every branch in your business. Tick the ones they should reach, untick the ones they shouldn’t, and Save.
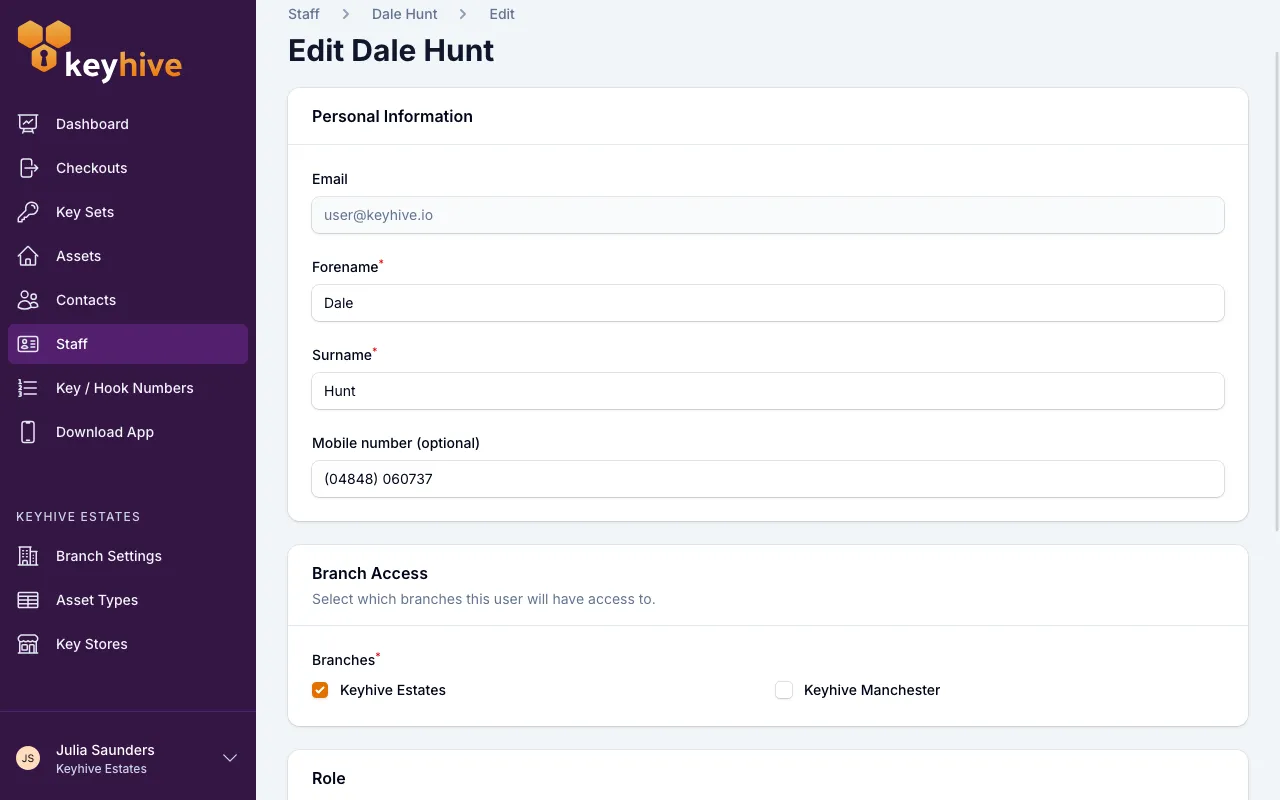
This is the only place you can give someone several branches in one go, or take one away. Anyone below Admin doesn’t see the section at all. For them, the Add to this branch route above is the way.
Everyone needs at least one branch. Keyhive won’t let you save with all of them unticked.
What happens at their end
They get an email titled “You’ve been added to [branch name]”, naming whoever added them. Someone who hasn’t accepted their original invite yet doesn’t get one. Their invite already covers it.
They pick a branch with the branch switcher. Click your name at the bottom of the sidebar, then Switch Branch, choose a branch, and click Switch. The whole portal follows: assets, key sets, contacts, staff and checkouts are all the ones belonging to the branch they’re in. The switcher only appears for people with more than one branch, so it stays out of the way for everyone else.
On the mobile app, the same thing sits in the menu: open the drawer and tap Switch Branch. The branch they’re currently in is shown at the top of that menu.
The Hive doesn’t switch. Each Hive signs in with its own branch’s Hive username and password, so it always works in the branch it belongs to, whoever’s standing in front of it.
Taking a branch away
Admins only, and it’s the same screen: open the person, choose Edit from the ⋮ menu, untick the branch under Branch Access, and Save.
They keep every other branch, and they aren’t emailed about it. If you take away the branch they happen to be working in, Keyhive moves them to one they still have.
To stop someone using Keyhive altogether, don’t strip their branches back to one. See How to disable or remove a staff member.
Good to know
- One person, one login. Never create a second account for the second branch. Two accounts on two email addresses means two sets of key history for the same person, and no way to see it together.
- Their role applies everywhere. A Manager with three branches is a Manager in all three. You can’t make someone an admin at one branch and an everyday user at another. Change their role on the same Edit screen.
- They see one branch at a time. Nothing is merged into a combined view; what they’re looking at is whatever branch the switcher is set to. See Working across more than one branch for what that means day to day.
- They appear in the Staff list of every branch they can reach, and their own page lists them all under Assigned branches, which is the quickest way to check who has what.
- Adding a branch doesn’t move any keys. Anything they’re holding stays exactly as it was, recorded where it was checked out.
- You can only add people from your own business. The email has to belong to someone already in your organisation; anyone else goes through a normal invite.