

How to check out multiple keys
In short: On the Hive and the mobile app you can keep scanning fobs to build up a list, then check them all out together: one recipient, one return date, one signature. There’s nothing extra to turn on: just keep scanning.
When you’d do this: Someone’s taking several key sets at once, such as a few sets for a round of jobs, everything for one site, or a handful of keys going out with one person for the day.
Before you start
Everything about checking out (picking the recipient, choosing short-term or long-term, signing) works exactly as it does for a single key set. This article only covers the scanning part; for the full flow see How to check out a key.
Each key set still needs a fob assigned and must not already be checked out to someone else.
Doing several at once? Use the Hive or the mobile app. The web portal checks out one key set at a time, so for a batch the two scanning apps are much quicker.
On the Hive
- Tap the first fob on the reader to start, exactly as usual.
- Keep tapping. Present the next fob, and the next. You don’t need to touch the screen in between. Each key set is added as it’s read, and they build up in the panel on the left so you can see what you’ve got.
- Carry on through the flow. Choose the recipient and the return date as normal. You can still add another key set part-way through: just tap its fob and it joins the list.
- Sign once. The recipient signs a single time and every key set in the list goes out to them together.
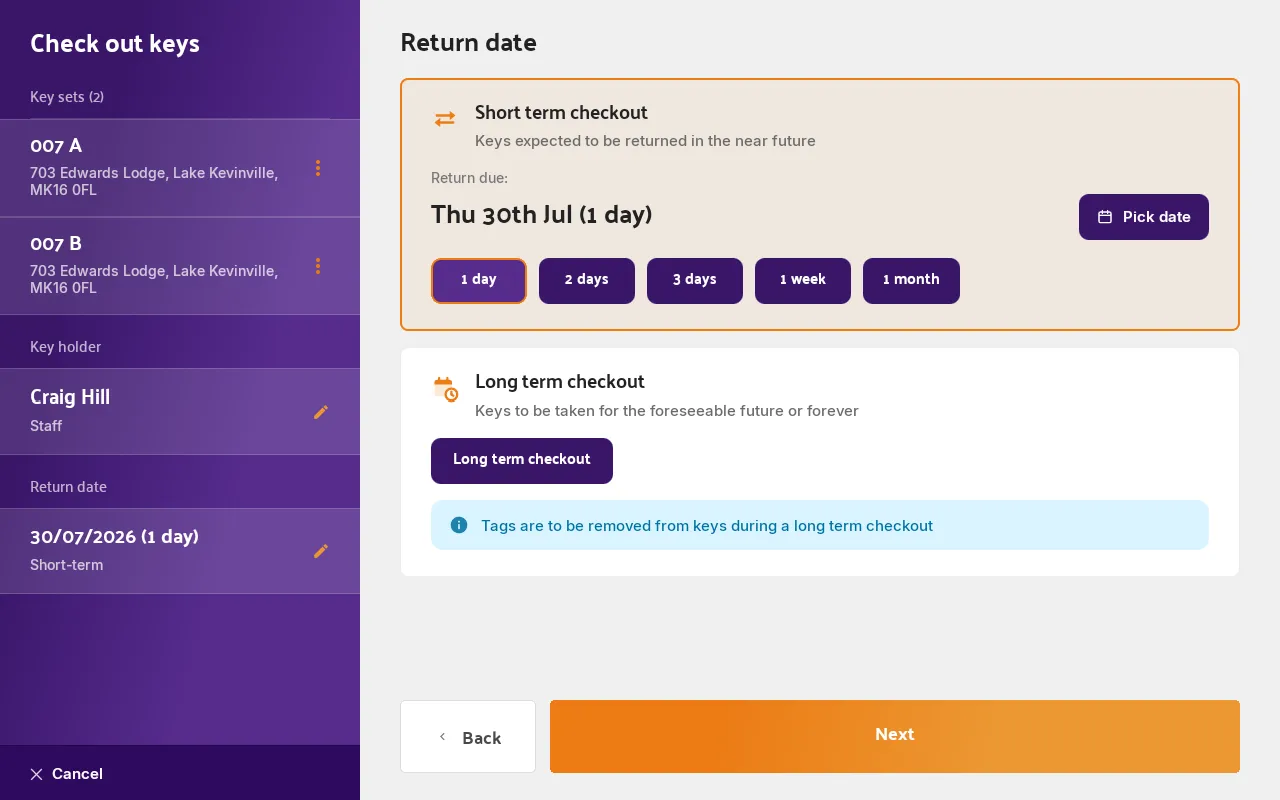
Scanned one by mistake? In the left panel, choose Remove from checkout on that key set. (If it’s the only one left, removing it cancels the checkout, so start again by tapping a fob.)
On the mobile app
- Tap the orange scan button on the home screen.
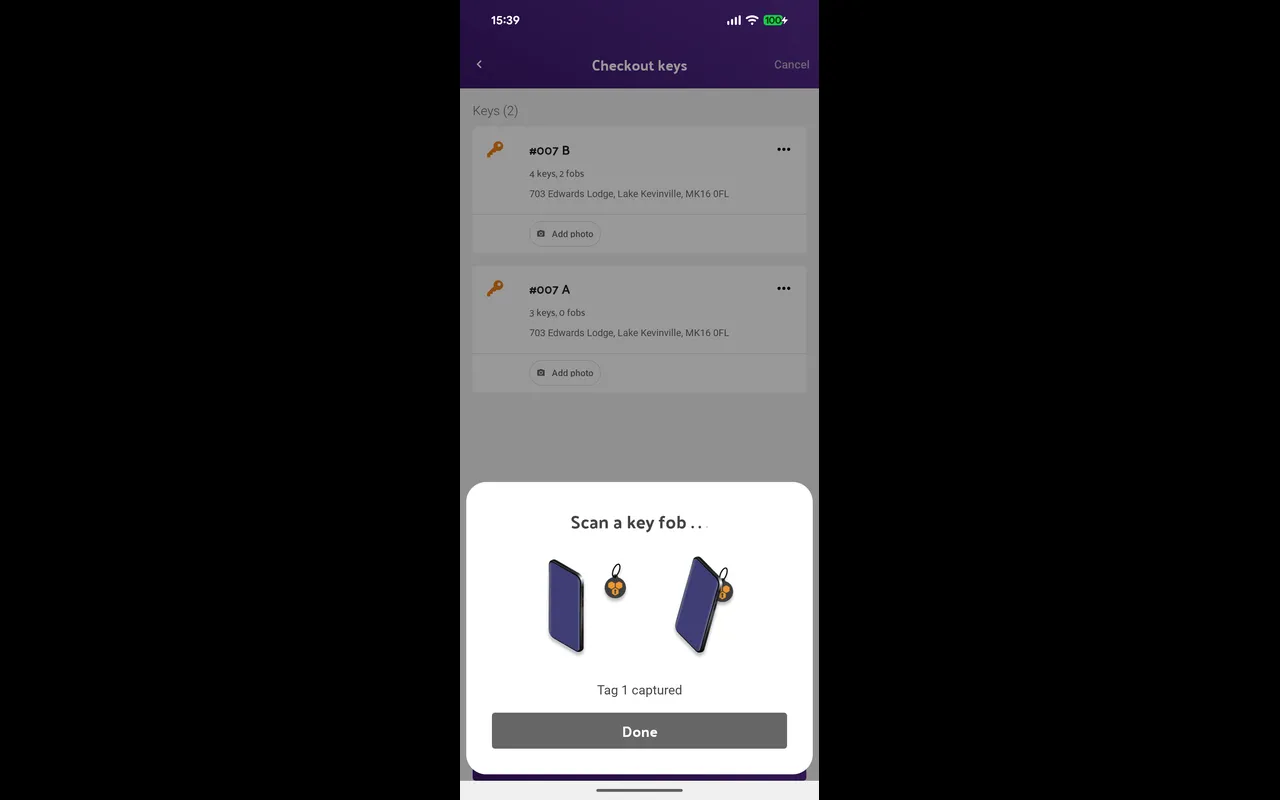
- Hold the phone to each fob in turn. The app keeps scanning, so you can work through a bunch of key sets without tapping the screen between each one. Only key sets that are actually available get added.
- Check the basket. The Checkout keys list shows everything you’ve scanned. Remove anything that shouldn’t be there, or scan more to add to it. Tap Next.
- Finish as normal: choose the recipient, confirm the return date, and the recipient signs once for the whole basket.
If a fob won’t add
The apps tell you why a fob wasn’t added, and simply carry on so you can keep scanning the rest:
- “Already added”. That key set is already in this checkout. Nothing to do.
- “Already checked out” (usually naming who has it). The key set is out with someone else. It needs returning before it can go out again.
- “This fob isn’t assigned to a key set”. The fob is blank. Assign it to a key set first; see How to assign a fob to a key set.
- “Couldn’t read that fob”. The tap didn’t register. Hold the fob steadily against the reader and try again.
Good to know
- One recipient, one return date. Everything scanned goes out to the same person on the same terms. If two people are taking keys, do two checkouts.
- Mixing short-term and long-term isn’t possible in one go. The whole batch is either short-term or long-term. See Short-term vs long-term checkouts. If you need a mix, run them as separate checkouts.
- Photos are still per key set. If you’re attaching photos, you add one to each key set individually. See How to add a photo of a key set.
- You can bring several back at once too. Returning works the same way: keep scanning fobs on the Hive or mobile app and they’re all returned together. See How to return a key.