

How to create a contact
In short: In the portal, click Contacts in the sidebar, then Create Contact. A forename and surname are all that’s required, but add an email or a phone number so you can reach them. You can also create a contact on the spot while checking keys out on the Hive or the mobile app.
When you’d do this: When you’re handing keys to someone who isn’t on your team, such as a contractor, a client or a visitor, and they’re not in Keyhive yet. A contact has to exist before you can check a key out to them, so most contacts get created at the moment they first collect keys.
Before you start
Contacts are external people. Your own team are staff: they’re invited by email and get a login instead. Don’t create a contact for a colleague.
Anyone can create a contact. There’s no admin permission needed on any of the three routes below.
Adding a lot at once? Import them from a spreadsheet rather than typing each one. See How to import contacts from a spreadsheet.
If Keyhive is connected to an outside system such as a CRM, your contacts may arrive from there automatically. The portal’s create form tells you which applies to you: either a note saying the contact will be pushed across to that system once you save, or a note saying it will only be stored in Keyhive. Contacts that came from a connected system are managed there and can’t be edited in Keyhive.
In the portal
The portal is where you’d add someone ahead of time, before they turn up for the keys.
-
Click Contacts in the sidebar, then Create Contact at the top of the list.
-
Fill in the form. Only Forename and Surname are required, but add an email if you have one: it’s how Keyhive chases them about keys they’re holding. Each contact needs their own address: if it’s already on another contact, Keyhive won’t let you save until you change it.
-
Click Save.
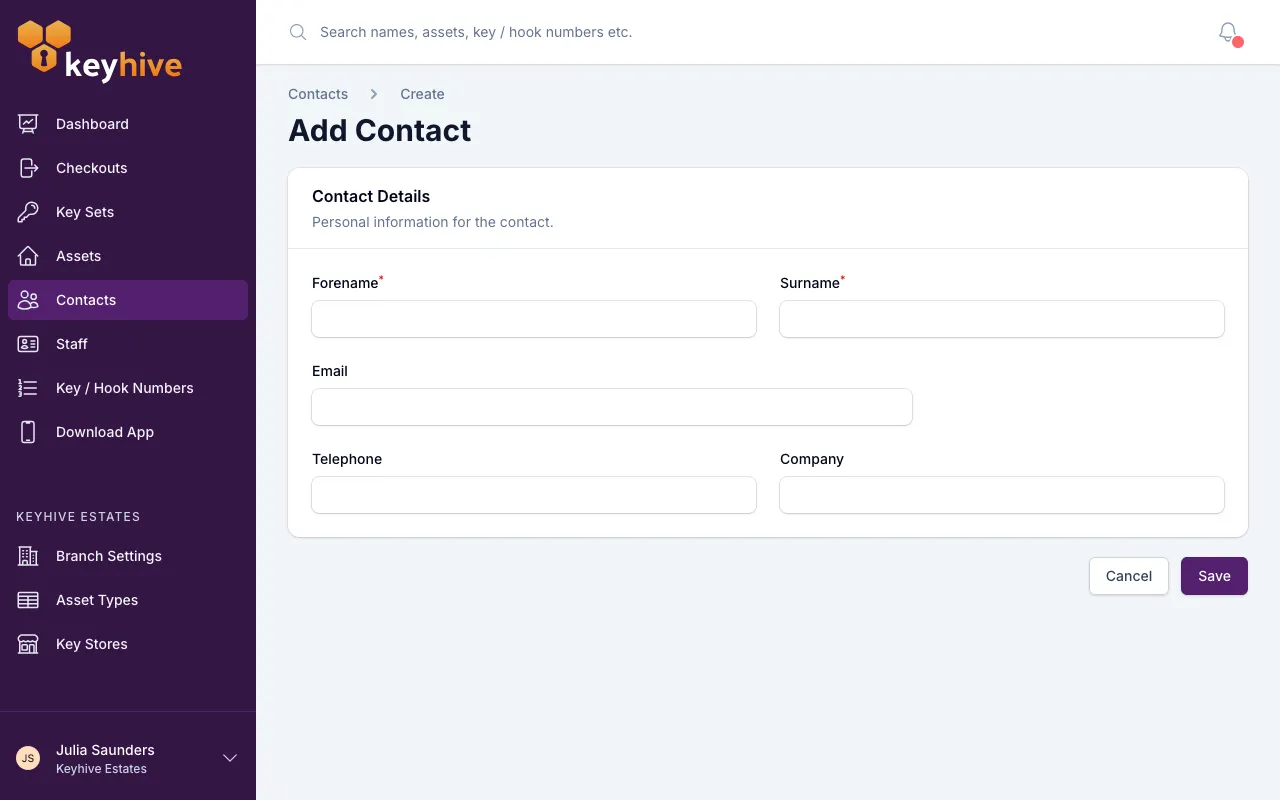
You land on the new contact’s page, where you can see their key history and edit their details.
If you leave both the email and the phone blank, Keyhive checks you meant to: “No contact details entered… You haven’t added an email or mobile for [name]. If they ever hold a key that hasn’t been returned, there would be no way to contact them.” Click Yes, continue to save anyway, or close the message and add one.
On the Hive, while checking keys out
If someone’s stood in front of you and they’re not in Keyhive yet, add them without leaving the checkout.
-
Scan the key set’s fob to start the checkout as normal.
-
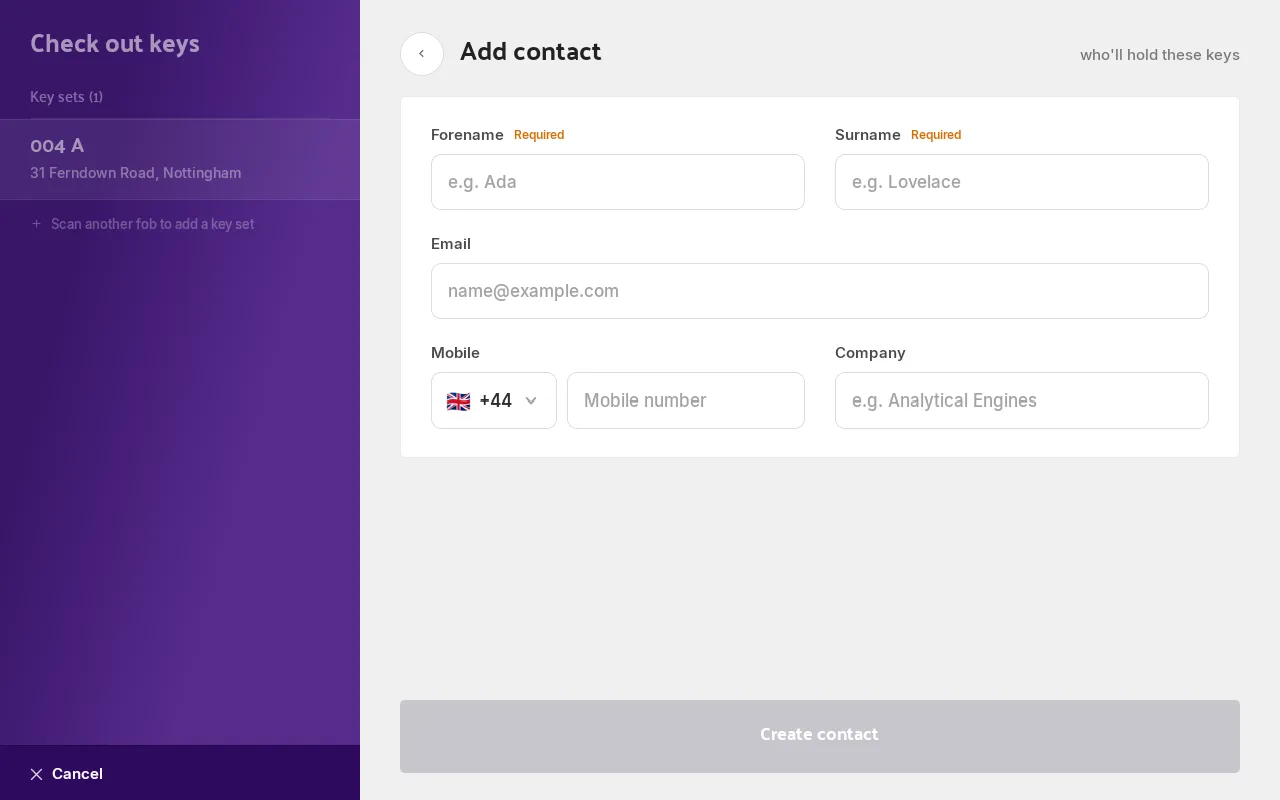
On the Key recipient step, tap New contact, top right, next to the step heading.
-
Fill in the details. Forename and Surname are marked Required; Email, Mobile and Company are optional.
-
Tap Create contact.
They’re selected as the key recipient straight away and the checkout moves on to the return date; there’s nothing extra to tap.
If the email is already in use, the Hive says so rather than creating a second record: “A contact already uses this email”, with the matching contact listed underneath. Tap Use this contact to carry on with the person you already have, or change the email address to create a new one.
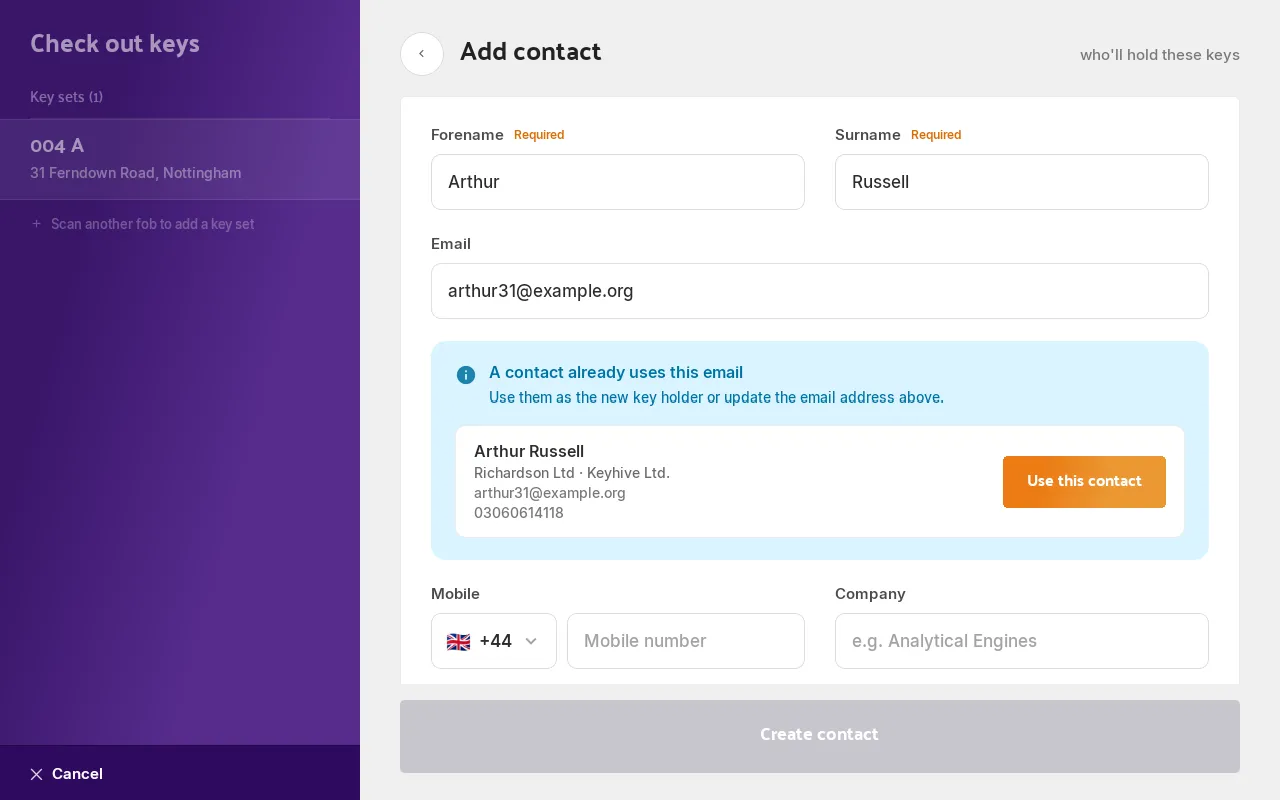
If you leave both the email and the mobile blank, the Hive asks you to confirm: Add a contact method to go back and fill one in, or Create anyway.
On the mobile app, while checking keys out
Same idea, away from the Hive.
-
Scan the fob and go through to the Key recipient step.
-
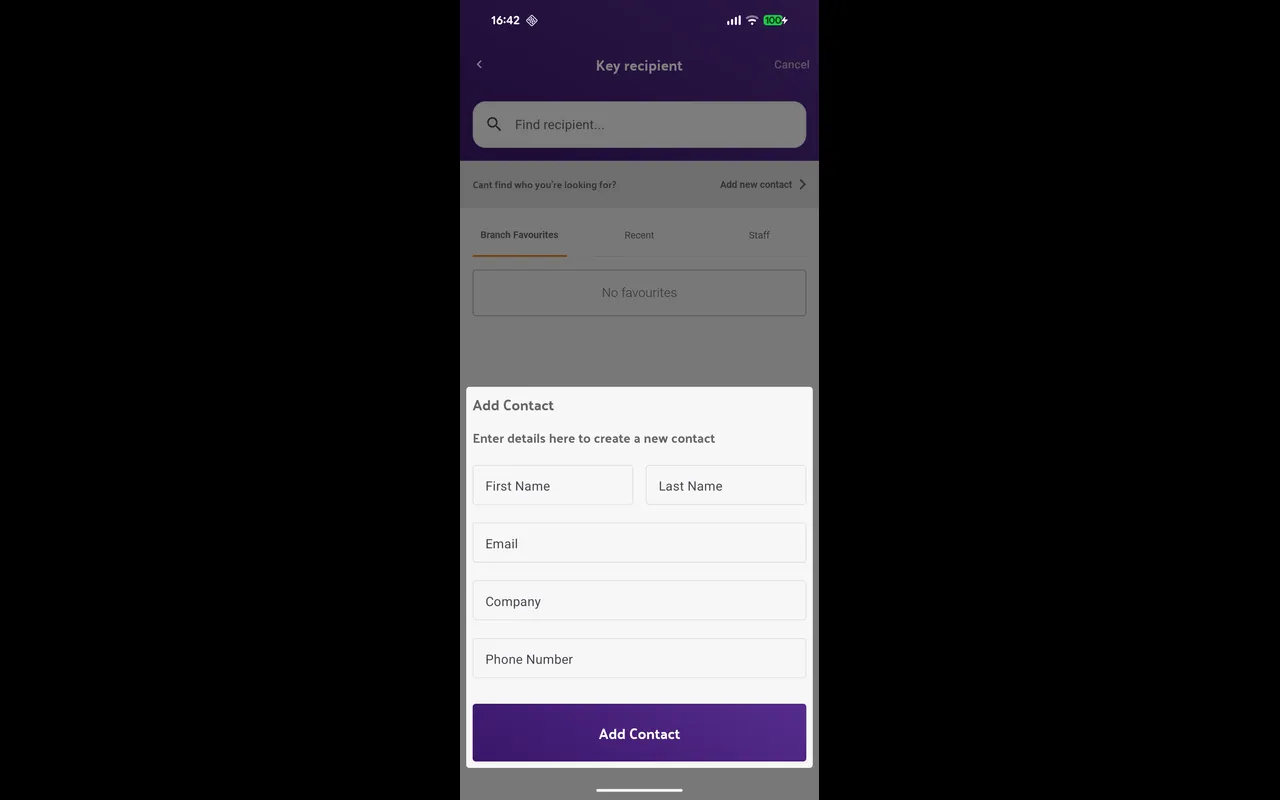
Tap Add new contact, next to “Can’t find who you’re looking for?”, just under the search bar.
-
Fill in the details. First Name, Last Name and Email are all required here; Company and Phone Number are optional. A field left empty turns red and the button stays greyed out until you complete it.
-
Tap Add Contact.
They become the key recipient and the app goes to the confirmation step.
Good to know
- It’s one list, wherever you add them. A contact created at the Hive or on a phone is the same record you’ll see in the portal’s Contacts list a moment later, with their full key history attached.
- The email does the chasing. Overdue reminders, and notice of a changed return date, go to the contact’s email address. A contact without one can still hold keys; you just have to chase them yourself.
- An email address belongs to one contact. If you’re told it’s already in use, that person is already in Keyhive; use the existing record so their key history stays in one place.
- Two contacts can share a name. Keyhive won’t stop you creating a second J. Smith, so search before you add someone if you’re not sure.
- You can change the details later. Open the contact and choose Edit from the ⋮ menu next to their name, unless they arrived from a connected outside system, in which case change them there.