

How to return a key
In short: Returning a key set closes its checkout and puts the key back into a key store, ready to go out again. How you do it depends on how the key went out: a short-term key set comes back by scanning its fob; a long-term key set comes back when you give it a fob again.
When you’d do this: Whenever a key set comes back, after someone drops keys off at the end of a job, a visit finishes, or a borrowed set is handed back.
Before you start
The way you return a key set depends on how it left:
- Short-term checkout. The fob is still on the key set, so you return it by scanning that fob. This is the everyday case, covered first below.
- Long-term checkout. The fob was removed when the key went out, so there’s nothing to scan. You return it by assigning it a fob again, which records the return at the same time. See Returning a long-term key.
Returning a short-term key
On the Hive
The Hive is the quickest place to take keys back.
One-time setup: tell the Hive where it lives. If your account has more than one key store, the Hive asks “Where is this kiosk?” when it’s set up, so you pick the store it sits at (for example, Main office or Van 2). From then on, everything returned or assigned at this Hive is recorded at that store, so you always know where a key is. You can switch it later from the Hive’s settings if it moves. Most accounts have just one store, so you won’t see this at all.
-
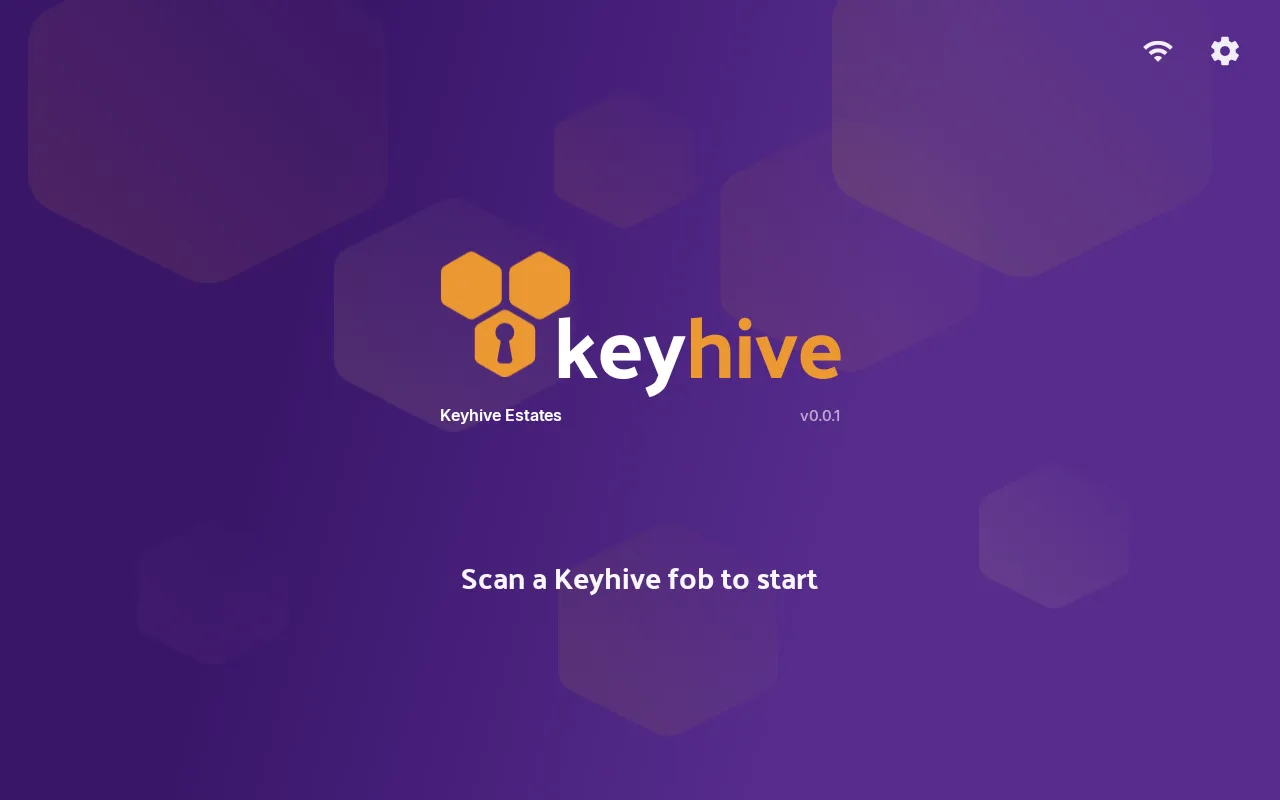
Tap the fob to start. From the home screen, tap the returning key set’s fob on the reader. You can tap more than one to bring several key sets back together, and they build up in the left panel as you go.
-
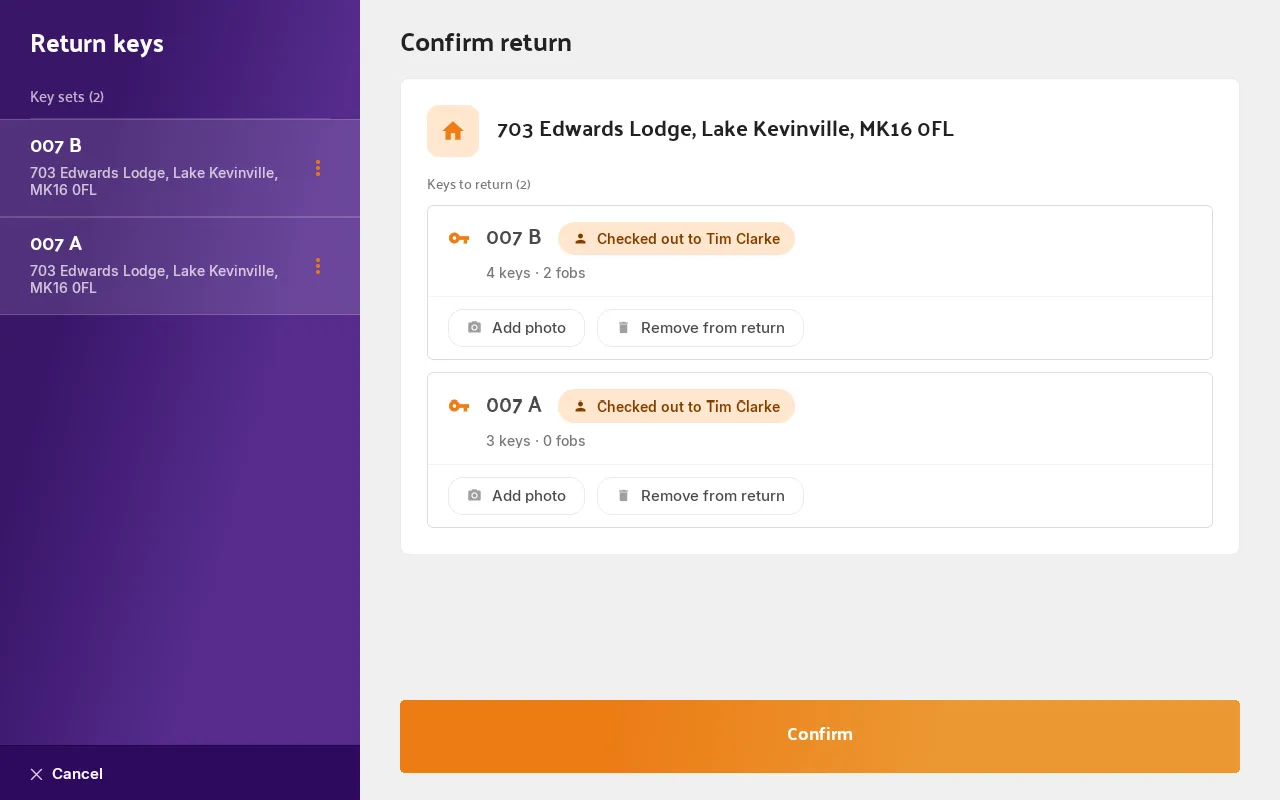
Check and confirm. That’s the whole flow, a single step. The left panel lists the key sets you’ve scanned; the main window shows them with a bit more detail so you can check you’ve got the right ones. Confirm, and the keys are returned and back in the store.
On the mobile app
Use the mobile app to take keys back when you’re away from the Hive. Because the app isn’t tied to one store, it asks where the keys are going.
-
Scan the fob. From the home screen, tap the scan button and hold the phone to the returning key set’s fob.
-
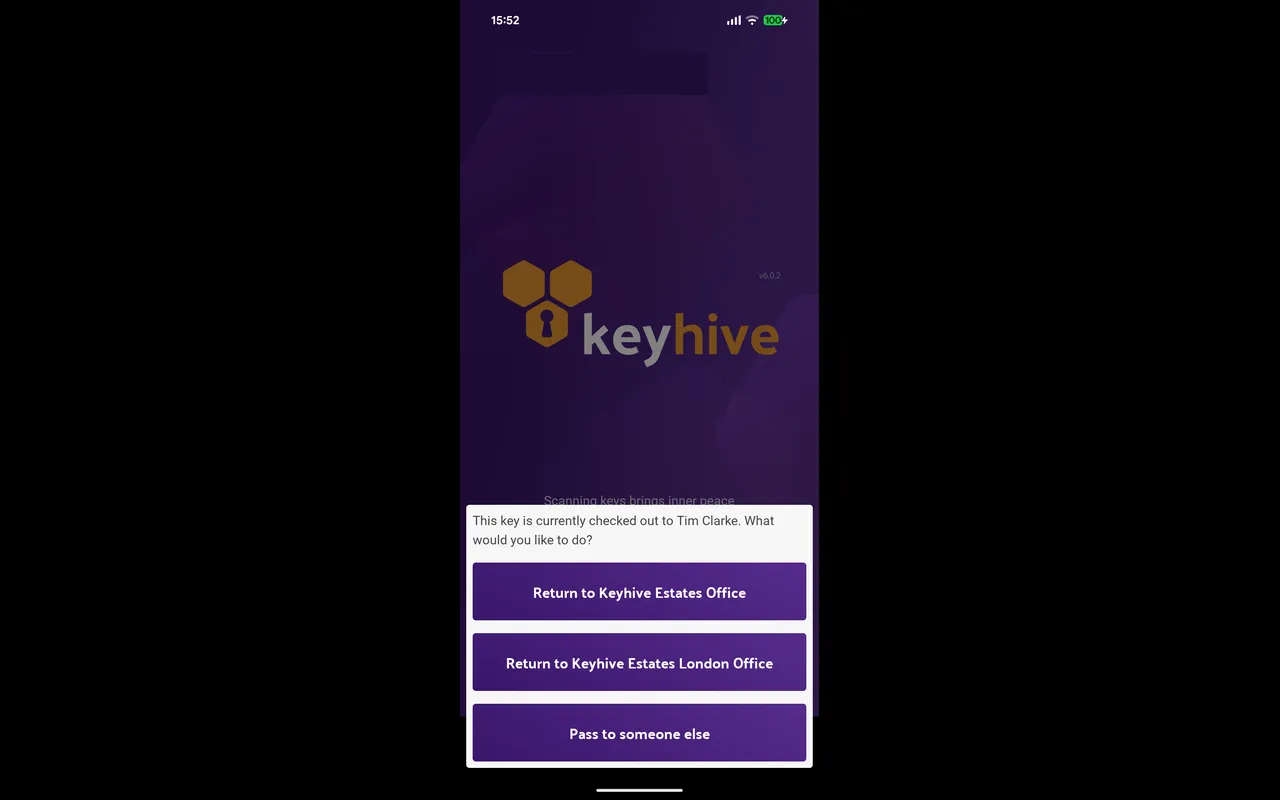
Choose what happens to the keys. The app tells you who the key set is checked out to and offers Return to [store name], one button for each of your key stores, so a single-store account sees one. Tap the store the keys are going back to.
The same list also offers Pass to someone else, for when the keys aren’t coming back to a store at all but going straight to their next holder. That starts the handover flow instead of a return. See How to pass a key to someone else.
-
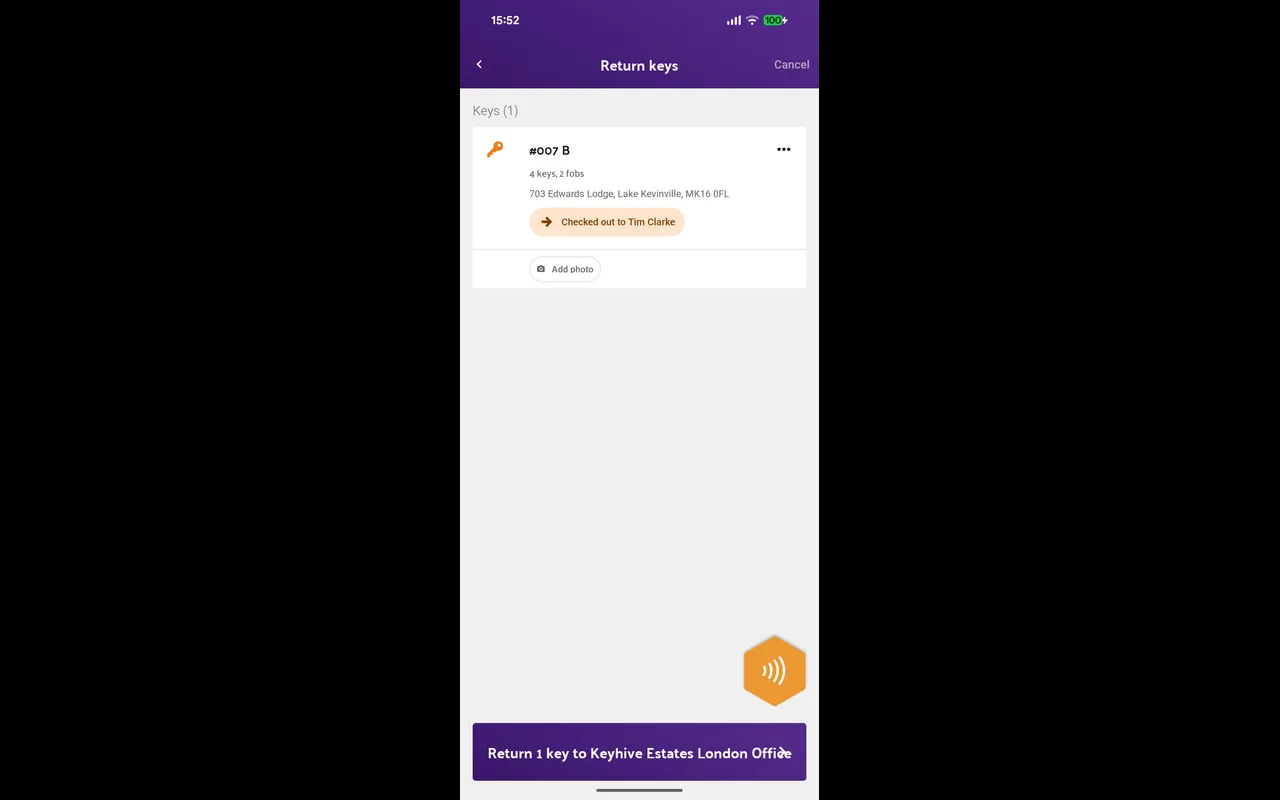
Confirm the return. You land on the familiar key basket, listing what you’ve scanned. Scan more fobs to bring back several at once, or tap the button, which names where they’re going (e.g. Return 2 keys to Main office), and the keys are returned.
In the web portal
The portal is best when a key comes back but the keys themselves aren’t in front of you, for example when someone phones to say they’ve posted them back.
-
Open the checkout. Go to the checked-out key set, or straight to its checkout page.
-
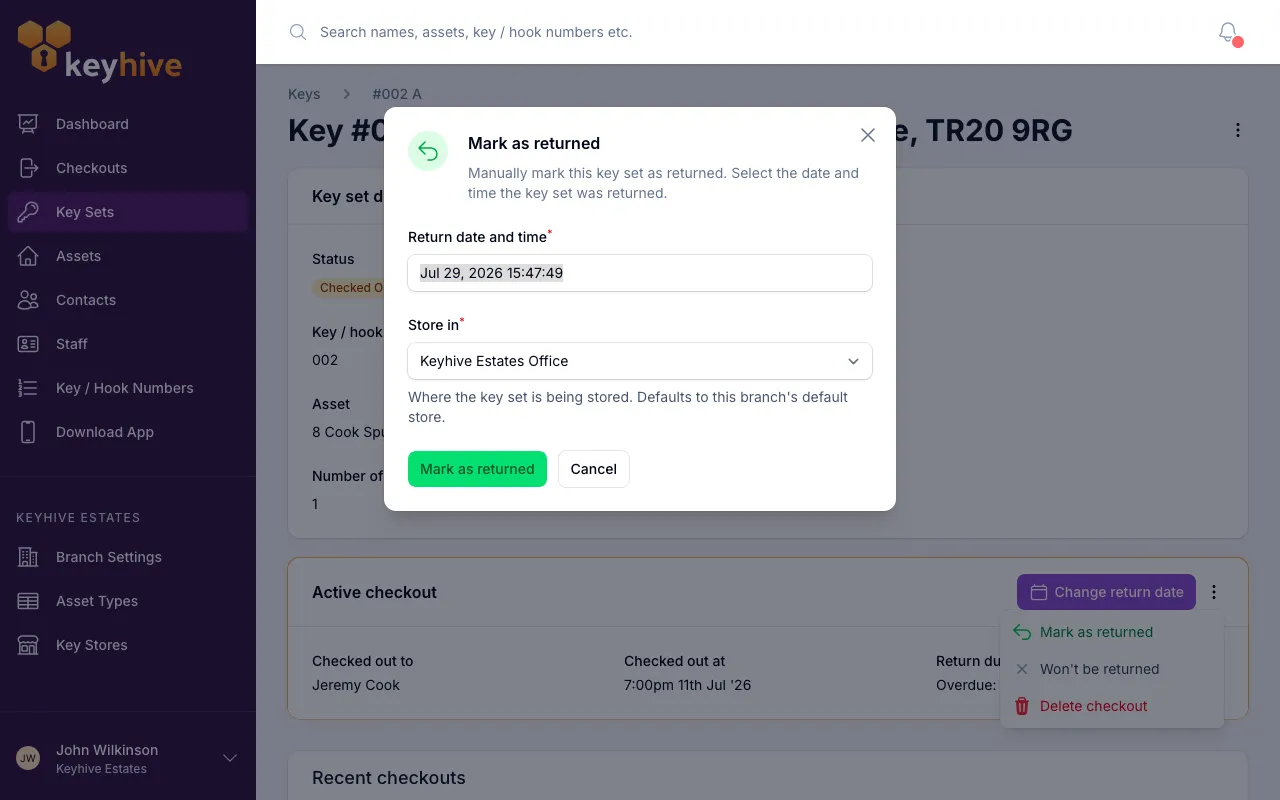
Open the actions menu. Click the actions icon (the vertical dots) and choose Mark as returned.
-
Fill in the return. A short form appears:
- Return date and time: when the key set actually came back (defaults to now).
- Store in. If your account has more than one key store, choose where the key set is being kept. Otherwise it goes to your default store automatically.
-
Click Mark as returned and the checkout is closed.
Returning a long-term key
A long-term key set went out with no fob. The fob was freed for reuse the moment it left (see Long-term checkout). So there’s nothing to scan on the way back.
Instead, you return it the same way you’d bring any fob-less key set back into circulation: by assigning it a fob. Because every key set in Keyhive should carry a fob, giving the returning key set a fob is what puts it back on the shelf, and Keyhive treats that as the return, closing the long-term checkout in the same step. You don’t do anything separately.
You’ll find this in the assign-a-fob flow: scan or enter the fob you’re attaching, choose the key set it belongs to, and confirm. The key set is now available again, sitting in a store, ready for its next checkout.
New to fobs? See How to assign a fob to a key set, the same flow that brings a long-term key back.
What if the key isn’t coming back?
A return is for a key set that’s physically back with you. If a key set isn’t coming back (it’s been lost, handed over for good, or retired), don’t mark it as returned. Doing so would put it back on your available-key list as if it were ready to go out again, which it isn’t.
Instead, close the checkout as won’t be returned. You pick a reason (lost, handed over, decommissioned, or other), and Keyhive removes the key set and frees its fob while keeping the full history. Mark as returned in the portal is only for key sets that really have come back.
See How to close a checkout for a key that won’t come back.
Good to know
- Returns always land in a store. However a key comes back, it goes into a key store, so it’s available again straight away and you always know where it is.
- Bring several back at once. On the Hive and mobile app you can keep scanning fobs and return them all together, the same way you check several out.
- Attach a photo if it helps. On the Hive and mobile app you can add a photo to a returning key set, handy for recording condition or which keys came back. See How to add a photo of a key set.
- Going straight to the next person? The keys don’t need to come back first. On the mobile app you can hand them over where you are. See How to pass a key to someone else.