

How to disable or remove a staff member
In short: In the portal, open the person from the Staff list, click the ⋮ menu next to their name, and choose Disable. They can no longer sign in or be handed keys, everything they’ve ever done is kept, and Restore from the same menu gives them their access back.
When you’d do this: When someone leaves the business, moves to a job that doesn’t involve keys, or is away long enough that you’d rather their login didn’t work while they’re gone.
Before you start
This is an admin job. You need Manager or Admin access.
You can’t disable yourself, and you can’t disable or restore someone whose role is above yours: a manager can’t disable an admin. In both cases the option isn’t there.
It’s a portal job. You can’t disable anyone from the Hive or the mobile app.
Get their keys back first. Keyhive won’t disable someone who’s still holding a key set. See If they’re still holding keys below.
Disabling is how you remove someone. There’s no separate step that erases a staff member. Their name stays attached to every key they’ve ever taken out.
Disable them
-
Open the person. Click Staff in the sidebar and click their row, or type their name into the search bar at the top of any page.
-
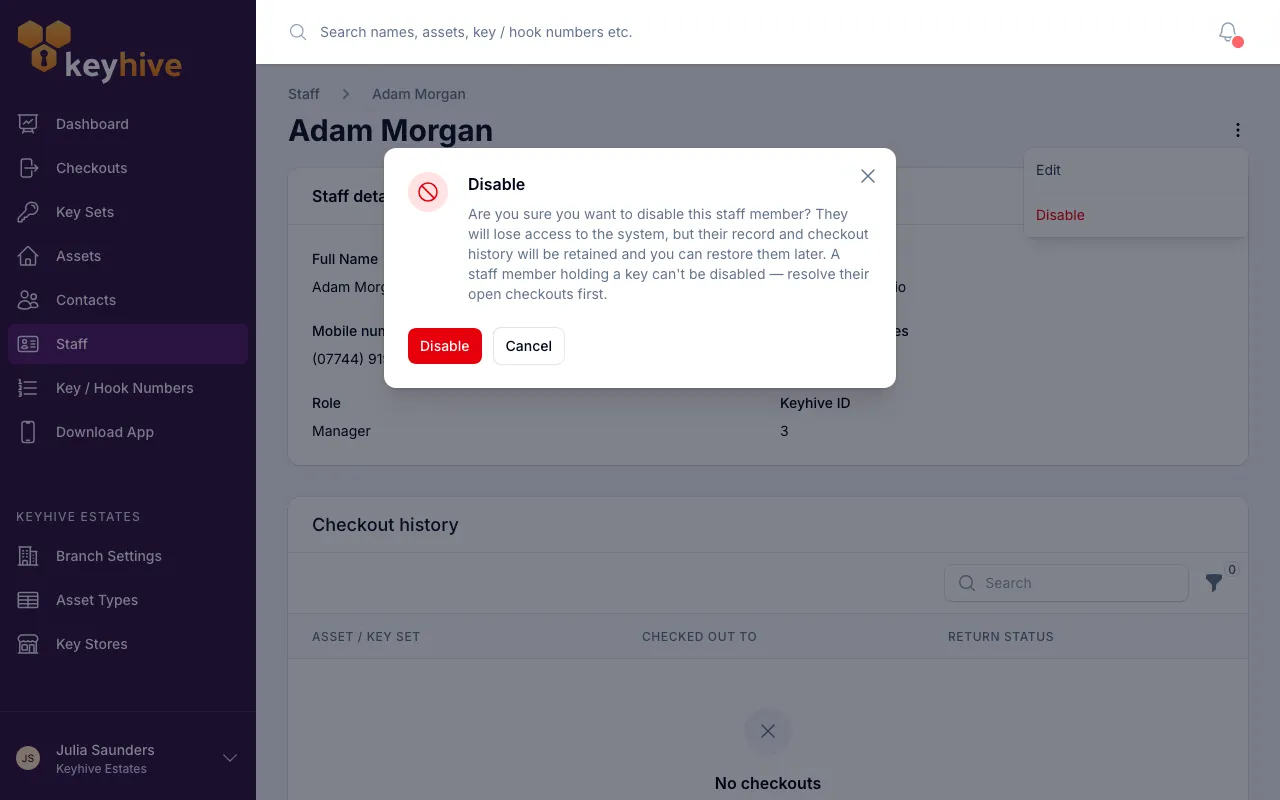
Click the ⋮ menu next to their name, and choose Disable.
-
Confirm.
You land back on the Staff list, with a red Disabled badge against their name.
If they’re still holding keys
Keyhive stops you, and tells you they’re still holding a key, with a link straight to the checkout. Deal with each one first:
- The keys are back with you. Return them.
- The keys aren’t coming back. Close the checkout as won’t be returned.
Then disable them.
If they’re holding keys out long-term and those keys have gone with them for good, close the checkout as handed over: the key set is removed and the history kept.
What being disabled means
- They can’t sign in. Their password and their email address stop working, in the portal and in the mobile app.
- They can’t be handed keys. They stop appearing when someone’s choosing who a key set is going to: in the portal, on the Hive and in the mobile app.
- They stay in the Staff list, with a red Disabled badge, so you can see who used to be on the team and restore them if they come back.
- Their history is untouched. Every checkout they ever made still shows their name, and their page still lists it all.
- It applies everywhere. A staff member has one login, so disabling them covers every branch they had access to. See Giving a staff member access to more than one branch.
- It frees their place on your plan. Someone disabled doesn’t count towards the number of staff your plan allows, so you can invite their replacement.
They aren’t told. No email goes out. They’ll simply find their sign-in no longer works.
Restoring someone
Two routes, both from the portal:
- From their page. Open them from the Staff list, click the ⋮ menu next to their name, and choose Restore.
- From the list. Hover their row on the Staff list and click the circular arrow icon. It’s only there on people who are disabled.
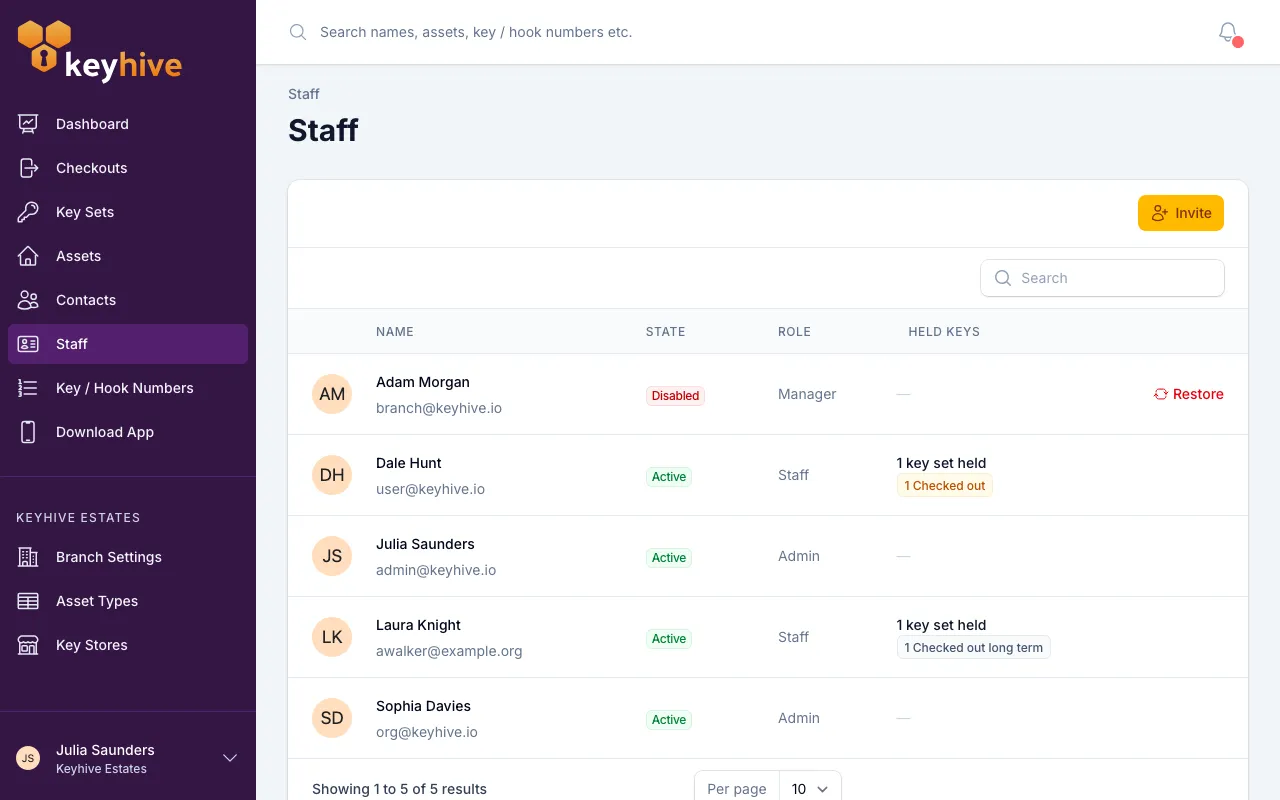
They get everything back: the same login and password, the same role, and the same branches they had before. Nothing needs setting up again, and there’s no fresh invite to accept.
Trying to invite them again instead? Entering their email on the invite screen tells you the address belongs to someone who’s disabled, and stops there. Restore them from the Staff list. That’s the way back in. See How to invite a staff member.
Good to know
- You can disable someone who never accepted their invite. An unaccepted invite is still an account, and it’s disabled the same way.
- Disabling isn’t the answer to a change of job. If someone’s staying but shouldn’t be doing admin work, change their role instead. If they’ve moved between branches, adjust their branch access rather than disabling them.
- A disabled staff member isn’t a contact. If someone leaves your business but still borrows keys from you occasionally, disable their staff account and create a contact for them. Their old checkouts stay on the staff record.
Related
- How to invite a staff member
- How to change a staff member’s details or role
- How to see what a staff member is holding
- Giving a staff member access to more than one branch
- Understanding staff roles (staff, manager, admin)
- How to return a key
- How to close a checkout for a key that won’t come back
- Glossary: Staff · Contact · Checkout