

How to invite a staff member
In short: In the portal, click Staff in the sidebar, then Invite at the top of the list. Enter their email address, fill in their name and role, and Keyhive emails them a link to set a password and sign in.
When you’d do this: When someone joins your team and needs to use Keyhive, whether to hand keys over, to take keys out themselves, or to see what’s out with whom. Staff are your own people; anyone outside your business is a contact instead, and contacts don’t get a login.
Before you start
This is an admin job. You need Manager or Admin access. If there’s no Invite button on the Staff list, ask someone who has it.
It’s a portal job. You can’t invite anyone from the Hive or the mobile app.
You’ll need their email address, and it has to be theirs alone: an address can only belong to one person in Keyhive. It’s where the invite goes and how they sign in from then on.
Keep an eye on your staff limit. You can keep inviting people until you reach the number your plan allows. If you’re close, get in touch and we’ll sort it.
Invite them
-
Click Staff in the sidebar, then Invite at the top of the list.
-
Type their email address and click Continue.
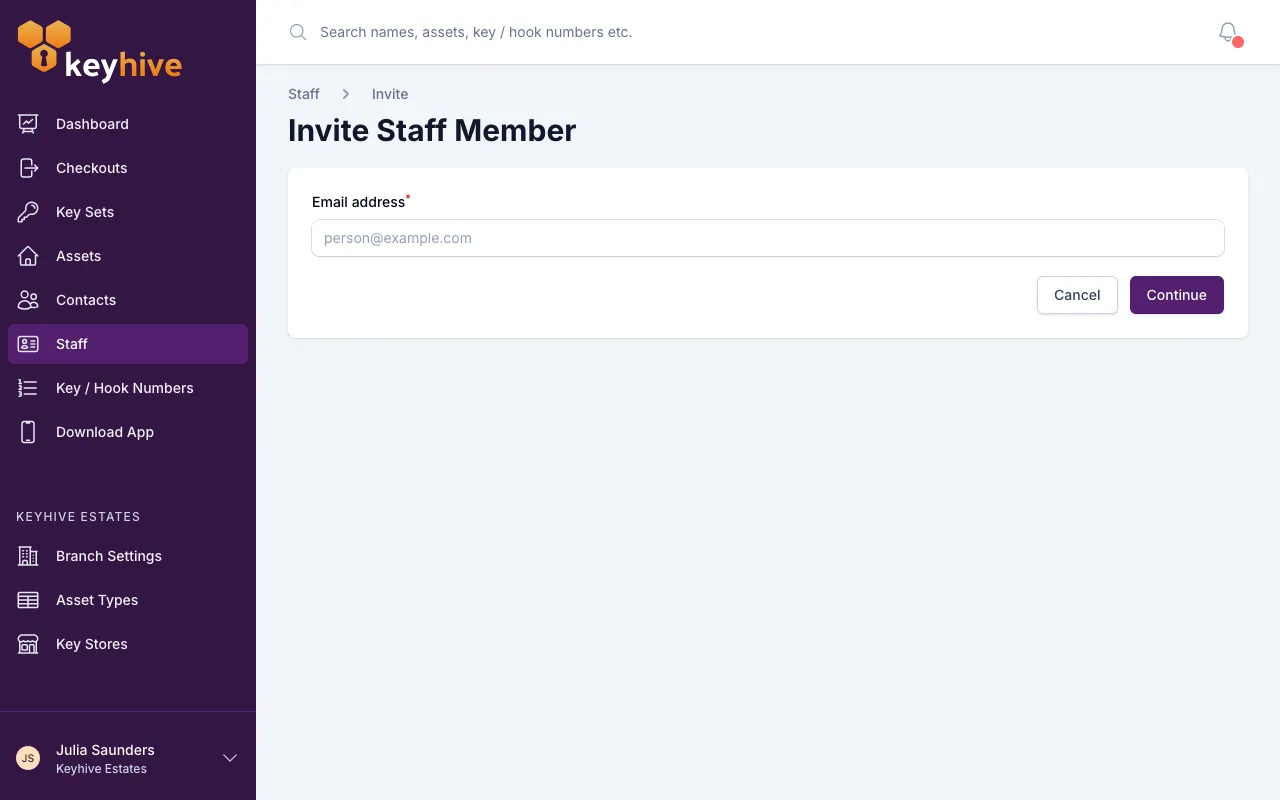
Keyhive checks that address before going any further, and what happens next depends on what it finds. See What Keyhive tells you about the address below. For someone new, you go straight to the form.
-
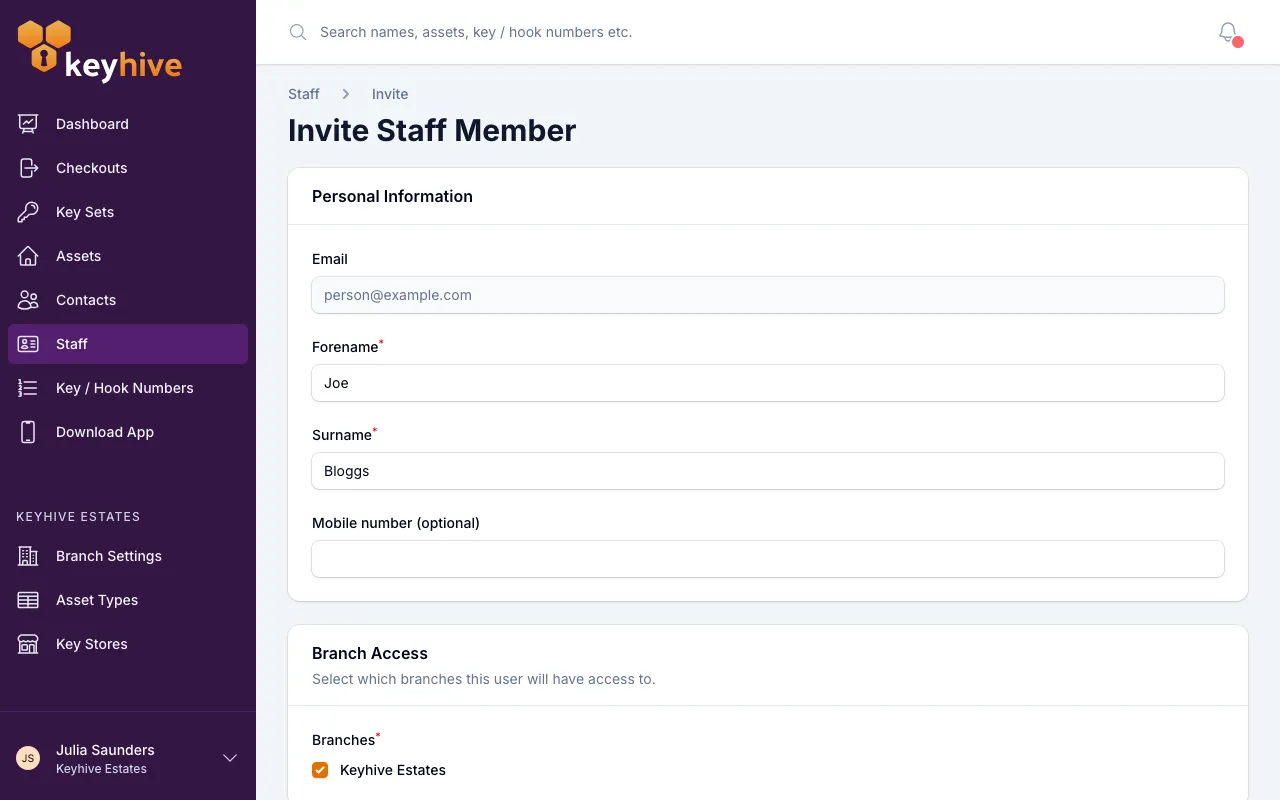
Fill in the form. Their first name, surname and role are required; a mobile number is optional. The email address is already filled in and locked. Use Use a different email at the bottom if you got it wrong.
-
Choose their role. Each one is described on screen:
- Staff. Everyday use: checking keys out, returning them, creating and editing records, and seeing what’s out.
- Manager. The above, plus managing staff, changing your settings, and archiving or deleting records.
- Admin. The above, across every branch in your business.
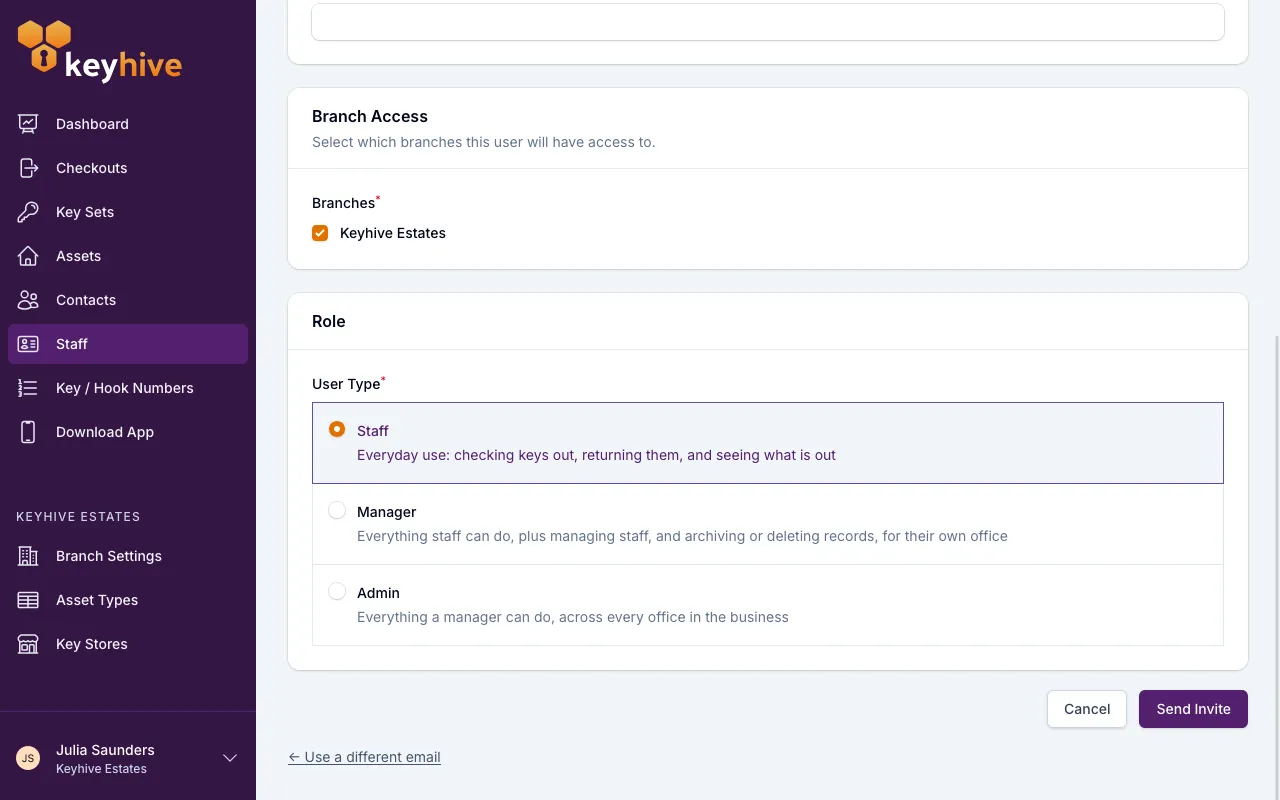
You can only give someone a role up to your own, so a Manager can create Staff and Managers but not Admins.
-
Click Send Invite.
You land on the new staff member’s page, and the invite email goes out immediately.
If you’re an Admin
You’ll also see a Branch Access section listing every branch in your business. It starts with the one you’re working in ticked; tick more if this person works across several. Anyone below Admin doesn’t see this section, so people they invite join the branch they’re currently in.
What Keyhive tells you about the address
Entering the email first means Keyhive can spot someone who’s already in your business before you fill anything in. You’ll get one of four results:
- Nobody has it. You go on to the form and invite them as normal.
- They’re already in your business, in another branch. Keyhive shows you who, and which branches they’re in, and offers Add to this branch. That gives them access here on top of what they already have, without a second account or a second invite. See Giving a staff member access to more than one branch.
- They’re already here. Nothing to do; they can already work in this branch.
- They’re disabled. The address belongs to someone whose access was turned off. Restore them from the Staff list first, rather than inviting them again.
What happens at their end
They get an email from noreply@keyhive.io titled “Your invite to Keyhive”, naming you as the person who invited them and the branch they’re joining. Clicking the link in it takes them to a page where they choose a password, and from there they sign in.
The link expires after 7 days.
Good to know
- They can hold keys before they’ve accepted. Someone you’ve just invited can be picked as the person taking keys on the Hive or the mobile app straight away. Accepting the invite is only about getting them signed in.
- The Staff list shows you who’s still outstanding. Anyone who hasn’t set their password yet carries an Invited badge; it turns to Active once they have.
- To send the invite again, hover their row on the Staff list and click the envelope icon. It’s only there while they’re still Invited. Do this if the 7 days have run out, or if the email never arrived, in which case have them check their junk folder for noreply@keyhive.io before you resend.
- You can change their role later, and their name and mobile number with it. See How to change a staff member’s details or role. You can’t change the email address they were invited with.
- Staff aren’t contacts. Don’t create a contact for a colleague: they’d have no login, and their key history would sit in the wrong place.
Related
- Understanding staff roles (staff, manager, admin)
- How to change a staff member’s details or role
- Giving a staff member access to more than one branch
- How to disable or remove a staff member
- How to create a contact
- How to install and sign in to the mobile app
- How to check out a key
- Glossary: Staff · Contact